For more useful videos, subscribe to our YouTube Channel.
As a business owner, you have your own strengths and talents – but graphic design might not be one of them.
After you’ve signed up for Easel.ly, you might catch yourself staring at all of the templates or the “Start Fresh” canvas wondering:
How do I make a professional-looking infographic?
You may have learned how to put a few text blocks and shapes together, but you want your infographic to reflect your professionalism and high-end products or services. That’s why we put together a list of steps to make sure your infographic looks 100% professional.
As you create your infographic, whether from a template or from scratch, you can check off each of these points along the way.
Infographic Creation Checklist
Our first tips for making the most professional infographic possible is to use a rough draft. You can use handwritten notes, blank template drafts, or this Planning Worksheet to lay out your design.
From there, make sure you:
- Keep “on brand” with the right colors and fonts. Make sure the template/colors you’re using are a similar design/color to your web copy or content.
- Search for Objects or Upload images that represent your ideas. Keeping text to a minimum is key to a professional infographic.
- Make sure your infographic is the right size. Does the size of your infographic fit all of your Objects, text boxes, and designs? If not, drag the lower right corner to resize width or length-wise. Don’t cram all of your information into a small image!
Then, insert all of your information – data, products, services, etc. – into your infographic. You can refine it later, but just get the “meat” of your infographic down for now. Once you’re done adding information, it’s time to do a quality check.
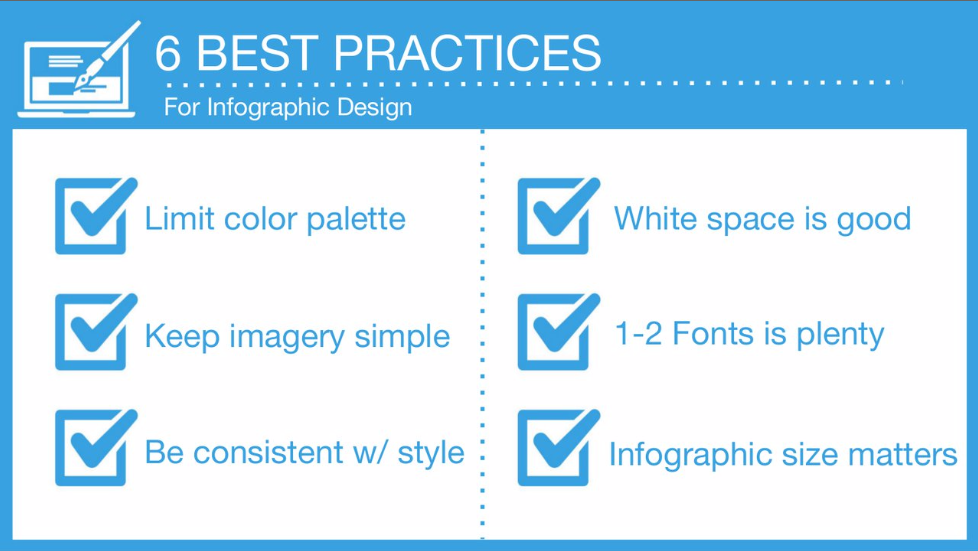
Quality Checklist
To keep it simple for you, here are our 6 best practices for infographic design. The key is to keep your infographics simple, especially at first.
When you’re almost done with your infographic, also ask yourself:
- Are your sections the same (or coordinating) sizes?
- Are your fonts the same (or coordinating) sizes?
- Are your colors and fonts consistent?
- Are your images the proper size?
- Are smaller objects, lines, or designs lined up properly?
- Does your image look cohesive – or are there “eyesores” that don’t flow well?
- Do you have a Call to Action?
Don’t be afraid to be picky. Once you get used to the process, creating an infographic will go much faster. For now, though, it’s important to take your time!
Also, always make sure to click “Save” occasionally so that you don’t lose your progress.
Before you click “Download” make sure to:
- Spell check and spell check again
- Check numbers, punctuation, bullet points, etc.
- Ask yourself: Does it look good?
- If so, click Download or Share
- If not, review the checklist again
This is where you separate your business from the crowd. Making a great infographic that pays attention to small details will be rewarded by shares and business growth!
Post-Creation Sharing
The final part of creating a professional infographic is knowing how best to share it. You can download an Easelly infographic in a few formats:

- Low Quality. Use these for:
- A quick social media image
- A rough draft / mockup
- High Quality. This is the most popular format:
- For multiple uses
- If you’re planning to resize the image later
- For marketing
- PDF. Use this option if:
- You’re emailing the infographic
- You’re inserting it into an ebook or marketing material
- You’re printing it off immediately
If the infographic you’ve created is going onto your website:
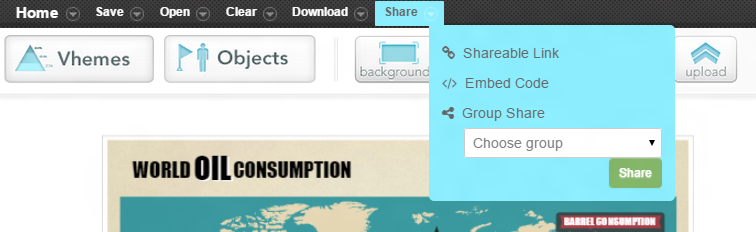
- Use the Embed Code in the Creation Tool
- Insert this into your text window of your website’s post panel
- Use the Shareable Link to draw people directly to your image
Let Your Infographic Work
Once you’re satisfied with your infographic, it’s time to share it. The best part about infographics is that you can use the same image in multiple places. Include your infographic on your:
- Website
- Social media
- Print ad marketing
- Ebooks or lead content
- Emails
You’ve taken all this time to create a professional-looking infographic. Now it’s time to let the image do its work!
More Business Infographic Creation Resources
For more help creating professional infographics, check out:
- Easy DIY: How to Make Infographics for Your Business
- Infographics Gone Bad: What to Avoid in Your Design
- Four Reasons Your Infographic Doesn’t Stand Out
—
Are you finding that you don’t enjoy infographic design? We are here to help. Check out our infographic design services so you can have a professional infographic every time!